
The 8 Growth Stages of Your Cannabis Plant
Cannabis transitions through different growth stages during its life cycle. The care and conditions required to germinate a seed, or root a clone are very different to conditions required to manage disease in late flower.
Providing an ideal climate for each growth stage of your weed plant will improve performance by maintaining momentum from seed to harvest.
Young cannabis plants are plastic, and root and shoot structure can be shaped for success during the seedling stage.
You can transplant and prune with perfect timing by understanding energy balance and plant development during veg.
Cannabis has a three-phase flowering stage, and you can harness the power of photoperiodism to boost your yields.

Cannabis Growth Stages:
Seed Storage (Dormancy)
Seed Germination Stage
Seedling Stage
Vegetative Growth
Pre Flowering Stage
Early Flowering
Mid Flower Stage
Late Flower (Senescence)
Seed Storage (Dormancy)
A seed is a storehouse of genetic potential. When cannabis seeds are properly stored, they can remain viable for 10-15 years.
The three key conditions for long term storage are Cool, Dry, and Dark.
Seeds are best stored in tinted jars, containing desiccant packs, in the fridge.
When you take them out, let the jar come to room temperature before opening to avoid condensation.
When cannabis seeds are first harvested, they have a high level of dormancy, or resistance to sprouting. This dormancy is a response to natural seasonal conditions.
If the seeds did not have some level of dormancy, they could all sprout soon after they fell from the plant, only to be killed by the coming winter.
A seed will slowly lose this dormancy over a period of a few months.
Seed Stratification
One way to increase the germination (sprouting) percentage of cannabis seeds is to store them in the refrigerator for a few weeks. This technique is referred to as cold stratification and imitates winter conditions to help seeds lose their dormancy faster.
Most reputable breeders will cold stratify their seeds after harvest, so that they are ready to sprout when you receive them. Cannabis seeds can have a germination success rate of over 95% the first season, with a slow decline in viability over time.
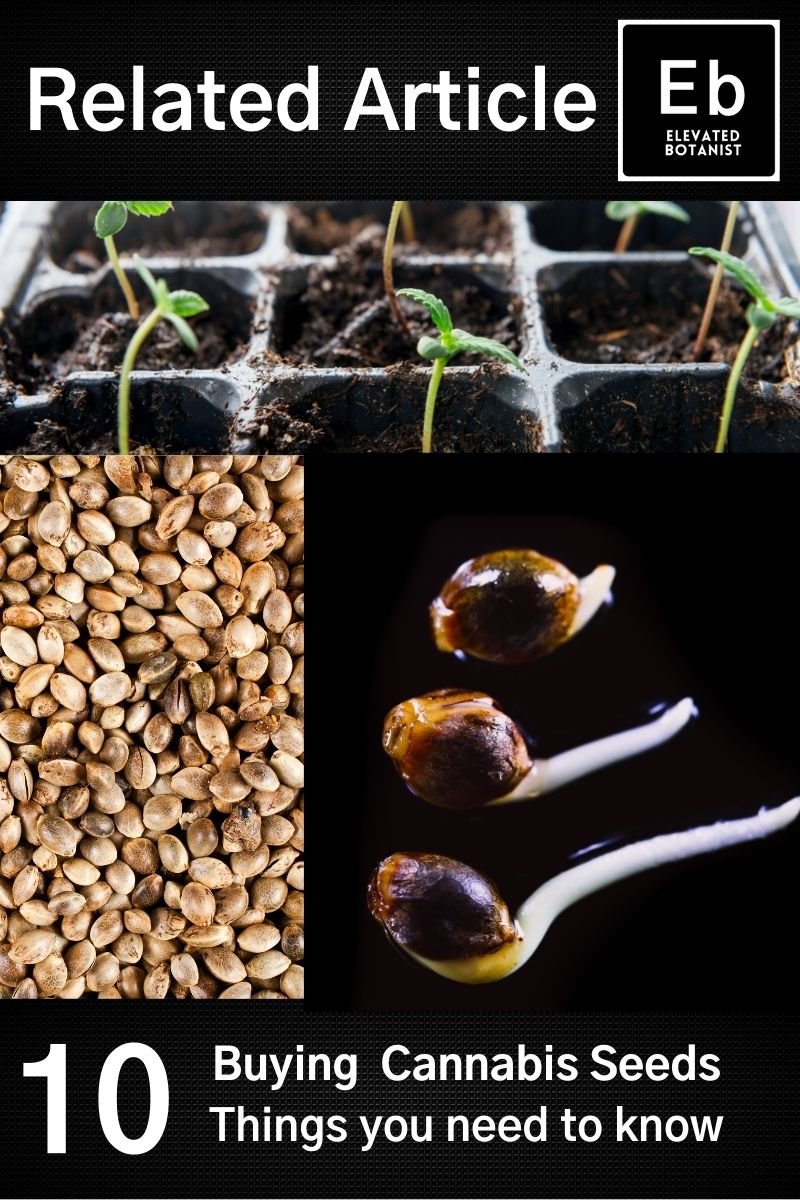
Seed Germination Stage
If a seed is viable, it will germinate when conditions are favorable for growth. A temperature of 70-80 F (21-27 C) and the presence of water and oxygen are required for the germination stage.
From soaking seeds to the first true leaves, the weed germination stage usually lasts 10-15 days. Cannabis seeds are protected by a durable seed coat and germination can be helped by scarification or roughening of the seed coat.

Peroxide Scarification
Weed seeds can be chemically scarified by soaking them in a .5% - 1% Hydrogen Peroxide solution for 16-24 hours.
This will kill pathogens on the outside of the seed, provide oxygen to the embryo, and soften the seed coat for faster germination.
You can make a peroxide solution for soaking seeds by combining 1 part household peroxide (3%) with 3 parts tap water.
Once oxygen and water have penetrated the seed coat, a taproot will emerge from the base of the seed.
If seeds are soaked for too long, or germinated in paper towels, this root radicle can be easily damaged when planting.
Seeds can be planted in small plugs, or directly sown into their final home. Weed seeds do not require high humidity to germinate, and it is best to leave them uncovered for improved airflow.
Grow from Seed
Once your cannabis seed is planted, the tap root will sense gravity and start growing down into the earth. Initial growth is fueled by energy reserves stored in the seed endosperm. This food source sustains the young plant until it can begin producing energy through photosynthesis.
As the tap root pushes down into the earth, the hypocotyl reaches for the light. This embryonic stem stretches from the soil, sometimes wearing the seed coat like a helmet.
A pair of seed leaves, or cotyledons expand to collect sunlight for the formation of more complex leaf sets. This photosynthesis begins the seedling growth stage.
Autoflowering plants are always grown from seed. These plants are in a hurry and won’t tolerate root disturbance. To avoid shock, most growers will avoid transplanting and direct sow, or transplant plugs as soon as they are rooted.
Rooting Clones
Clones like relative humidity (RH) over 80%, 24-hour photoperiods, and low light conditions to form new roots.
As clones start to root, the humidity should be slowly reduced to 70%-75% which is optimal for the early growth stage. Clones will usually root and be ready to plant after 10-18 days.
Plastic domes can be used to create a humid environment for your cuttings. High humidity and no airflow create ideal conditions for disease and clone domes should vented and removed regularly to allow for air exchange.
Whether growing from seed or clone, growers can benefit from the disease fighting powers of probiotics. Root plugs can be soaked in a solution containing microbial products like Actinovate, and Root Shield. These bioprotectants will help to fight off fungal pathogens that cause damping off, and other diseases.
Liquid kelp can also be used in your rooting solution. Kelp contains natural hormones called plant growth factors which promote root development. Kelp also contains micronutrients, vitamins, and amino acids. The best liquid Kelp products are cold pressed rather than heat treated to preserve these benefits.
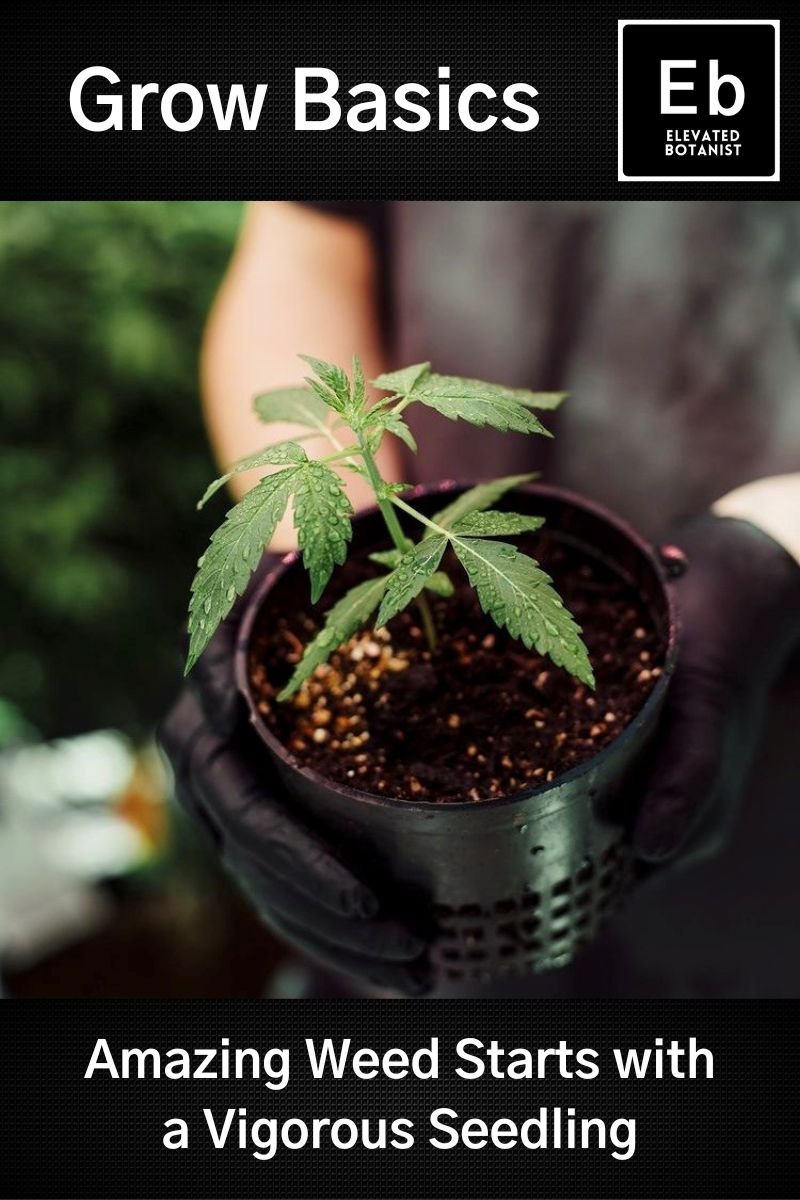
Seedling Stage
Ideal growth conditions for the weed seedling stage includes 65%-75% relative humidity and temperatures of 70-80 F (22-27C). You can use an inexpensive digital sensor to log temp and humidity so that you know what is happening in your grow room when you aren’t there. This growth stage usually lasts 2-4 weeks.
First Transplant
Clones or seedlings usually spend about 10 days to 2 weeks in plugs before they are well rooted and ready to go.
These plugs can be planted in small pots for the first few weeks of growth.
Root training pots between 1 quart (litre) and 1 gallon in size are perfect for the seedling stage.
Holes in the sides allow the pots to dry out quickly to avoid overwatering. Roots are guided to these holes where they stop growing.
This stimulates growth of radial roots closer to the plant, and results in a fibrous root mass that will quickly expand when transplanted to veg.
Conventional growers often start seedlings in a sterile mix and a light feeding program.
Seedling soil mixes are made from natural fibers and aeration inputs like perlite that allow rapid air and water exchange in the root zone. Organic soils contain compost and probiotics that help feed your plants and protect them from diseases. Seedlings are sensitive to heavy fertilization, but your plants will probably benefit form a light feed once they are rooted into the new soil.
Seedling growth
After the seed leaves have emerged, the stem continues to elongate, and a set of single bladed, serrated leaves will form. These first true leaves look like pot leaves and grow on opposite sides of the stem.
The connection point between each leaf stem (petiole) and the main stem is called a growth node. As your plant continues to develop, new shoots will form at each node, and eventually develop leaves and branches of their own.
Healthy seedlings will often form a couple of nodes per week and begin building more complex leaves as they grow. After 4 - 6 nodes, plants should be producing small 5 bladed leaf sets that will grow to become large fan leaves as the plant develops. Once young plants are well rooted, and growing vigorously, they can recover quickly from pruning and training.
Small adjustments made at the seedling stage can have a big impact on your plants structure and yield. Structure can be shaped during the seedling stage by use of low stress training, and high stress interventions like topping. Topping is the removal of the plant’s growth tip. This causes lower branches to receive more growth hormones, and rapidly grow toward the light.
Cannabis plants love light. Photoperiods are usually set for 18/6 and light intensity is slowly increased during the seedling stage to prepare for vegetative growth.
Vegetative Growth
Once a cannabis plant has a well-established root system, and 6-8 nodes of growth it enters the vegetative growth stage. Ideal conditions for veg growth is 60%-70% humidity and temps of 70-80 F (22-27C).
Indoor growers usually transplant into larger pots or soil beds for 1-4 weeks of vegetative growth before transitioning to flower. Your healthy seedling should root in quickly and grow like a weed during the veg growth stage.

When to Prune
Leaves expand during vegetative growth, and photosynthesis increases.
Plants convert sunlight into carbohydrates and use this energy for growth.
Plants also store carbohydrates in leaves and roots as an energy reserve for rainy days. Plants control how fast they grow to make sure they don’t consume energy faster than they can produce it.
This balance of energy production and storage is important for timing of pruning and transplanting.
When a plant is well rooted, the carbohydrates stored in roots will support growth of new shoots after pruning.
When shoots are growing vigorously, the energy stored in leaves will fuel rapid root growth after transplant.
Pruning is beneficial during the veg growth stage to remove lower shoots and leaves that will be growing in the shade. Happy plants that are well rooted and growing vegetatively will quickly recover from pruning lower growth.
Topping side branches during veg, can increase the number of top flowers, while decreasing plant height.
Spray and Scrog
Pruning also benefits pest management. Most pesticides that are safe to use on weed are contact killers and are most effective when they reach all plant surfaces. Pruning of lower branches improves airflow through the canopy and helps to disrupt establishment of Powdery Mildew disease.
Scrogging is a great way to even out your canopy. Plastic 6” x 6” trellis netting can be stretched on a frame to create a scrog grid. This frame can be installed just above the plant tops when they are well rooted and growing vegetatively. It is best to prune plants first, then spray for total coverage before you install the scrog net and make these jobs harder.
As plants grow through the net, branches can be redirected to other holes in the trellis to fill any gaps in the canopy. Branches that are growing too tall can be tied down to the grid so other branches can catch up.
Pre Flowering Stage
Most Cannabis plants will become developmentally mature when they reach 14”-20” in height, or 8 to 10 nodes of growth. At this stage the leaves and shoots at each node will begin to alternate, rather than occurring opposite each other. Plants may begin to pre-flower, developing reproductive organs that allow early identification of plant sex.
Cannabis plants are dioecious, meaning that male and female flowers grow on different plants. This is fortunate for us, as it allows us to select the desirable female plants, while eliminating male plants before they can pollinate our sinsemilla.
How to tell if your plant is male or female before flowering:
Male and female plants are easily identified once pre flowers have formed. Each female flower is a reproductive organ consisting of several parts. A pair of fuzzy white hairs extends from each pistillate flower to catch wind blown pollen. These hairs are called stigmas by botanists, but most growers refer to them as pistils. The emergence of these stigmas from preflowers is the first sign of a female plant.

Male preflowers will form a small ball on a short stalk and is an early sign of a male plant. These balls are pollen sacs that will continue to develop, before opening to release microscopic pollen grains.
Occasionally plants can have both male and female parts. These “hermies” can be a big threat because they are harder to detect, but still capable of seeding your precious weed. Early identification of male preflowers allows you to cull these intersex plants as soon as they occur.
With some strains the pre-flowers may not be evident until after flowering has been induced. This is inconvenient and can result in gaps in flowering canopies, and accidental seeding if growers are not careful.
Fem seeds
A great way to make sure your plants are all female is to start with feminized seeds. These seeds have been bred to produce only female plants. Intersex plants are always a possibility when growing from seed, whether they are feminized or not.
There are also lab tests available to determine if a plant is male or female. These cost about 10 dollars per test and can accurately identify plant sex through genetic analysis.
This process usually involves removing a cotyledon from a seedling, compressing it with blotter paper, and mailing the sample to a lab. If you are growing lots of plants from seed this is easier and safer than growing plants for months before knowing their sex.
Visual identification is straightforward, but with some strains the pre-flowers may not be evident until after flowering has been induced. This is inconvenient and can result in gaps in flowering canopies, and accidental seeding if growers are not attentive.
Early Flowering
Most strains are dependent on a change in light cycle to flip from vegetative growth to flower formation. Ideal climate conditions for this stage of growth include 55%-70% relative humidity and temperatures of 72-84 F (22-29C).
If you want to measure temperature the way your plant feels it, use a laser thermometer to take the leaf surface temperature. This stage of weed growth lasts 18-24 days until plants stop growing vertically to focus on bud expansion.

When to Flower
For indoor growers, knowing when to switch to a 12/12 light cycle from 18/6 can determine success or failure.
Weed plants can easily double in size during the early flowering stretch and outgrow the space they are in.
Water and nutrient uptake increase to support this rapid growth, so it is important that your plant is well rooted before flip.
Nitrogen uptake usually peaks in the early flower stage. Light intensity can be gradually increased to make up for the reduction in light from 18 hour to 12 hour photoperiods.
The first signs of females flowering start about a week after flip when the plants begin to “hair up” and grow more pistillate preflowers.
The plant will start to elongate or stretch in preparation for reproductive growth and by day 7-10 small round flowers will begin to form at branch tips. These budlets are clusters of pistils that look like little white puffs surrounded by a rosette of leaves.
Selective removal of fan leaves during early flower allows light to penetrate the canopy and improves airflow.
Outdoor Flowering
Outdoors, most photoperiod plants will begin to flower when they receive more than 10-11 hours of uninterrupted darkness during each 24-hour period. In the northern hemisphere, seeds are usually sown in May for a fall harvest. Clones will flower prematurely if planted outside too early in the season, then spend all summer trying to re-veg.
Autoflower crops can be repeatedly planted in outdoor gardens for an extended harvest. Photoperiod plants can also be forced to flower earlier in the season by using light dep systems. This involves pulling blackout tarps to simulate an early night.
There should be a strong focus on pest management during the early flower period. Reduction in pest populations to an absolute minimum during early flower will help to preserve crop quality during later flowering stages when pest pressures are higher, and treatments are more limited. Plants will stop growing vertically and making new leaves about 20 days after flowering begins.
Mid Flower Stage
Buds grow the most during the mid flower stage and will continue to expand until about 35 days after flip. Relative humidity should be reduced to 50-60% to limit the risk of fungal disease during this stage of bud growth.

Bud Growth
By mid-flower, your plants are at the peak of their reproductive potential. If no pollen is present, buds will continue to swell in desperation to be fertilized.
As they grow along the stems, buds will link up to become solid colas composed of thousands of individual flowers yearning to make seeds.
By mid flower, your plants are fully committed to budding, and photoperiods can be increased to 13 or 14 hours to maximize bud growth.
Plants will respond to more light by producing more weed if all other plant health requirements are met.
As the flowers expand, some of the older leaves will start to yellow, and fall off. These should be removed as soon as possible. Some of the fungal diseases that affect cannabis are saprophytes and will infect dying plant material.
Dense fields of trichomes will form on flowers, and sugar leaves as a response to reproductive frustration. These trichomes are biochemical factories that produce cannabinoids, terpenes, and other desirable compounds.
Late Flower Stage
The late flowering stage is when the bulk of psychoactive cannabinoids are synthesized. Between 20 and 30 percent of the dried flower weight is added during the final ripening phase. Humidity should be reduced to 50-60% to prevent bud rot from establishing in the large flowers. Temperatures should be reduced to a maximum of 80 degrees Fahrenheit (27 C), and nighttime temps can be dropped to the low sixties (16-18 C)
Cold temps during late flower help to preserve monoterpenes and can increase the purple color in buds. This coloration is caused by a pigment called anthocyanin. Anthocyanin absorbs light energy as heat and helps to protect plants against both hot and cold extremes. Purple is often seen as a selling feature for weed.
This final stage of plant life is also known as senescence. Many leaves will begin to yellow and die at this stage, and the plant is at its most vulnerable to fungal attack.
Photoperiods are usually returned to 12/12, and light intensity is decreased during late flower. Plant nutrient requirements are lower during late flower, and there is usually no need to feed during the last two weeks.
Harvest Timing
The synthesis of cannabinoids is a continual process, and psychoactive THC will degrade into other non-psychoactive substances like CBN if the flowers are harvested too late. Harvesting too early will result in loss of yield, and lower THC.
Cannabis flowers change appearance as they ripen and provide an early indicator for harvest timing. The white hairs or stigmas emerging from the pistils dry up and turn red or brown as they lose the ability to become pollinated. Cannabis plants will sometimes make new stigmas during late flower, but when most of the stigmas on a bud turn red, the plant is nearing harvest.
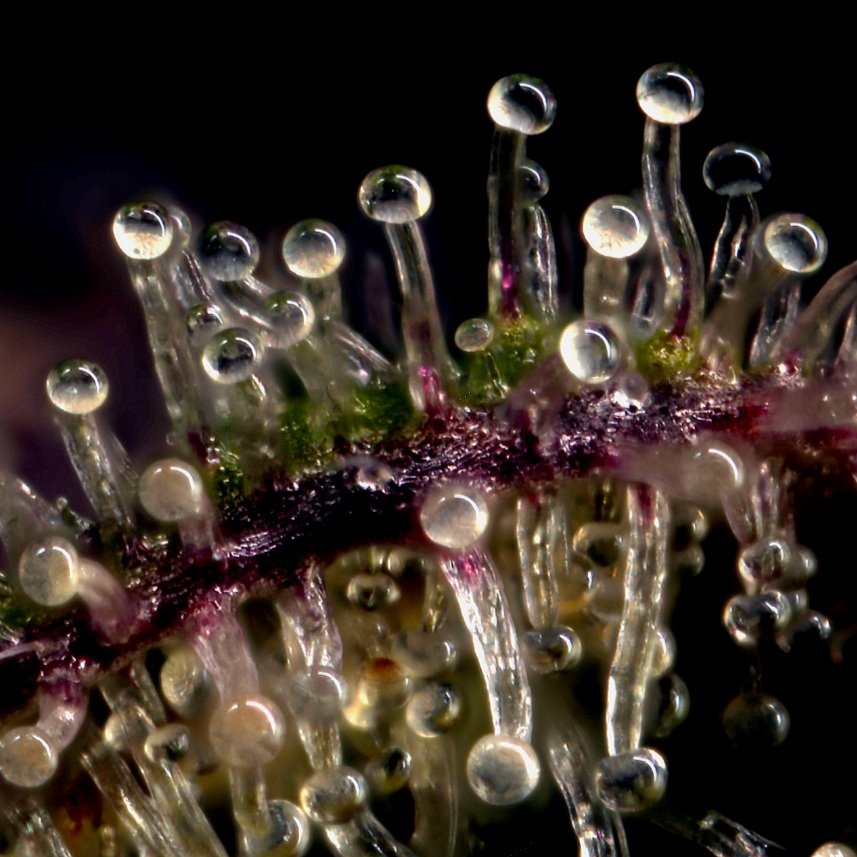
Another important sign of harvest time is trichome development.
Trichomes are formed as clear structures, and change appearance as cannabinoid synthesis progresses.
Trichomes become opaque, or milky colored as they mature, and then amber as they degrade. A phone camera of magnifying glass can be used to observe this development.
The optimal time to harvest will vary by strain, and by user preference. For many strains, peak THC content is when most of the trichomes are opaque, and a few have turned amber.
So, How long does weed take to grow?
If you are growing from seed, autoflowers are the fastest finishers and can be harvested between 70 and 100 days after germination. Photoperiod seedlings need to grow for 4-6 weeks before they are ready to flower.
Clones are mature when they root and can be planted densely in a sea of green and transitioned to flower right away. Most strains flower for 8 or 9 weeks, so an indoor grower could pull 5 or 6 harvests per year in a perpetual system.
Outdoor plants will sometimes veg for months before transitioning to flower. A fully grown weed plant in ideal conditions can be more than fifteen feet high and produce ten pounds of weed after an 8-10 month lifecycle.

Dry and Cure
Fresh cannabis will retain more of the volatile monoterpenes, and other bioactive compounds when properly dried and cured.
Cannabis should be dried slowly, under low temperatures for the best result.
Hang-drying cannabis branches slows the drying process by allowing moisture from the stem to migrate into the flower.
This process usually requires 14 days hanging prior to trimming and packaging. Check out the outdoor grow guide for more info on curing.
Growing your own cannabis is not rocket science, but your chances of success are much higher if you pay attention to your plants needs during the various development stages. For more great tips on growing weed, check out the Grow Basics articles here. Happy Growing!